
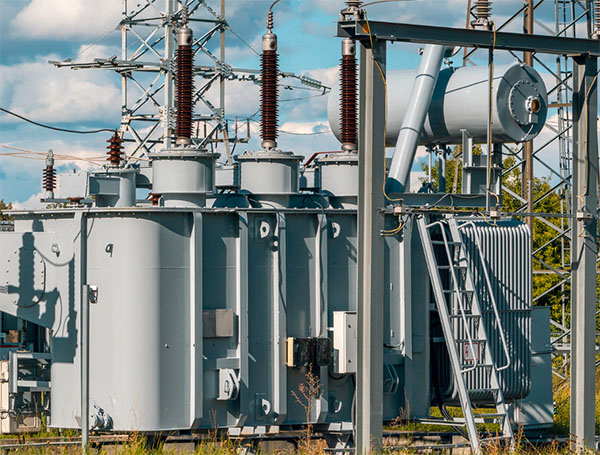
Transformer insulation is the silent protector of your equipment, ensuring that electrical currents flow safely and reliably through power systems. However, over time, insulation can degrade due to moisture, contaminants, overheating, or simple wear and tear. When that happens, it’s essential to replace the damaged insulation with precision to maintain the transformer’s performance and prevent costly failures.
As a professional electrical testing expert with years of experience in transformer maintenance, I can tell you that replacing damaged insulation is one of the most critical tasks for prolonging the life of your equipment. In this article, we will walk through the essential steps, best practices, troubleshooting tips, and tools required for a successful transformer insulation replacement.
Why Replacing Transformer Insulation Is Crucial
Before diving into the specifics of insulation replacement, it’s essential to understand why it matters so much.
The Importance of Transformer Insulation
Insulation materials protect electrical components from excessive current, preventing short circuits and electrical fires. Damaged insulation not only leads to system inefficiencies but can also result in:
- Overheating: Worn insulation causes overheating, which may lead to catastrophic transformer failure.
- Electrical Shorts: Deteriorated insulation increases the risk of partial or complete electrical short circuits.
- Reduced Efficiency: Compromised insulation reduces the transformer’s ability to handle load demands efficiently.
- Safety Risks: Faulty insulation can lead to dangerous situations, including fires or electric shock hazards for workers.
When the insulation becomes damaged, it’s critical to replace it before these issues manifest into larger problems.
How to Replace Transformer Insulation: A Step-by-Step Guide
Replacing transformer insulation isn’t a one-size-fits-all process. It requires precision, the right tools, and understanding the intricacies of the equipment. Below is a step-by-step guide to help you replace transformer insulation effectively.
Step 1: Prepare the Site and Equipment
Before starting the replacement process, ensure that you have all the necessary tools, and the work environment is safe.
Tools Needed:
- Insulation Resistance Tester
- Insulation Replacement Kit
- Safety gloves, goggles, and flame-resistant clothing
- Insulating Mats (for working on live circuits)
- Torque Wrench
- Cleaning materials (non-conductive solvents, brushes, and rags)
- Vacuum pump or drying equipment (if moisture is a concern)
Preparation Checklist:
- Ensure the transformer is de-energized and locked out.
- Establish a safe working zone with proper signage and barriers.
- Verify that all testing equipment (including insulation resistance testers) is calibrated and ready for use.
- Confirm that you have an adequate power supply for all tools and devices.
Pro Tip:
On one occasion, I was called to replace the insulation on a transformer that had failed after years of operating at a higher-than-expected load. During the inspection, we found that moisture had infiltrated the insulation system, which resulted in compromised performance. Ensure to dry out the transformer thoroughly if moisture is suspected to have caused the insulation damage.
Step 2: Inspect the Transformer and Identify Insulation Damage
It’s essential to assess the extent of the damage before removing any insulation. This step will guide you in selecting the correct replacement materials and procedures.
Inspection Process:
- Visual Inspection: Look for signs of wear and tear, cracks, discoloration, or signs of arcing or scorching.
- Insulation Resistance Testing: Use an insulation resistance tester to check the insulation resistance. A reading below the manufacturer’s recommended level indicates compromised insulation.
- Moisture Detection: Check for moisture, which may require drying the transformer before proceeding with insulation replacement.
Pro Tip:
On one site, we found that moisture intrusion was the primary culprit behind transformer insulation failure. We implemented a vacuum drying process before replacing the insulation, which significantly improved the transformer’s performance and lifespan.
Step 3: Remove the Damaged Insulation
Once you’ve confirmed the extent of the damage, it’s time to remove the old insulation. This is a delicate process, as the surrounding components may also be affected by the removal process.
Removal Steps:
- Disassemble the Transformer: Begin by removing covers and any external components that might obstruct access to the insulation.
- Careful Removal: Gently peel away the damaged insulation. Be careful not to damage any internal wiring or electrical components while removing the insulation.
- Cleaning: Clean the exposed areas using non-conductive solvents and brushes to remove any dirt, dust, or oils from the transformer surfaces.
- Inspection: Inspect the core and windings for any signs of damage or wear that may require attention before reassembly.
Pro Tip:
During one transformer repair, I found that the core had minor damage that was overlooked during previous inspections. This damage could have resulted in more severe failures later on. Always check all components, not just the insulation.
Step 4: Apply New Insulation
Now that the old insulation is removed, it’s time to apply the new materials. Precision is key to ensuring that the transformer performs optimally after the replacement.
Installation Steps:
- Select the Right Insulation Material: Choose insulation materials that meet the manufacturer’s specifications. Options include paper, oil, resin, and various synthetic materials, depending on the transformer type and load conditions.
- Wrap and Layer: Apply insulation in a layered fashion, ensuring that the material is tightly wound around the windings and core. Make sure there are no gaps or air pockets, as they can lead to insulation failure.
- Securing the Insulation: Once applied, secure the insulation material in place with adhesive or other securing methods as specified by the manufacturer.
- Conduct Insulation Testing: After the insulation is installed, perform another insulation resistance test to ensure the new insulation provides the required dielectric strength.
Pro Tip:
During one of my projects, I opted for a high-performance resin-based insulation material that offered superior moisture resistance. This was especially beneficial because the transformer was installed in a humid region, which helped prevent future moisture-related failures.
Step 5: Reassemble the Transformer and Conduct Final Testing
Once the insulation has been replaced, it’s time to reassemble the transformer and perform a series of tests to verify its functionality.
Final Steps:
- Reassemble the Components: Carefully put all the transformer components back together, ensuring that all parts are secure.
- Torque the Connections: Tighten any electrical connections to the manufacturer’s specified torque values to prevent loose connections.
- Fill with Insulating Oil: If applicable, refill the transformer with the appropriate insulating oil or coolant as per the design specifications.
- Final Testing: Conduct the following tests:
- Insulation resistance test
- Dielectric strength test
- Turns ratio test
- Oil quality test (if applicable)
Pro Tip:
During the reassembly process, I once encountered an issue with oil leakage after reassembly. Upon further inspection, I discovered a slight imperfection in the gasket sealing, which was resolved by replacing the gasket. Always double-check all seals to avoid leaks and ensure proper oil retention.
Troubleshooting Common Insulation Replacement Issues
Even with meticulous attention to detail, issues may arise during the insulation replacement process. Below are some common problems and solutions.
1. Low Insulation Resistance After Replacement
- Possible Cause: Moisture or contamination in the new insulation.
- Solution: Recheck the drying process and test again. Ensure that the transformer has been fully dried out before reinstalling new insulation.
2. Oil Leakage Post-Replacement
- Possible Cause: Imperfect seals or incorrect gasket installation.
- Solution: Inspect and replace faulty gaskets, and recheck all sealing connections.
3. Transformer Overheating
- Possible Cause: Incorrect insulation material or installation.
- Solution: Verify that the correct insulation material was used and that the installation was completed according to the manufacturer’s specifications.
Best Practices for Transformer Insulation Replacement
To maximize the effectiveness of your insulation replacement and extend the transformer’s lifespan, adhere to the following best practices:
- Choose Quality Materials: Always use insulation materials that are certified and meet manufacturer standards.
- Follow Manufacturer Guidelines: Stick to the recommended replacement procedures and material specifications to avoid voiding warranties.
- Conduct Regular Inspections: Regularly inspect transformers for signs of wear or contamination, so insulation replacement can be done proactively.
- Test After Replacement: Always perform thorough testing after the replacement to ensure the transformer is operating efficiently.
The Future of Transformer Insulation Materials
As technology evolves, so do transformer insulation materials. Future trends in transformer insulation may include:
- Advanced Composite Materials: New synthetic materials that are lighter, more durable, and resistant to moisture and chemicals.
- Smart Insulation Systems: Integration of sensors to monitor the condition of insulation in real time, allowing for predictive maintenance.
- Sustainable Materials: Increased use of environmentally friendly and recyclable insulation materials.
Conclusion
Replacing transformer insulation is an essential task for maintaining the health and longevity of your equipment. By following the proper procedures, using quality materials, and adhering to best practices, you can ensure that your transformer remains efficient and reliable for many years. Keep in mind that timely insulation replacement can prevent costly failures, improve system reliability, and extend transformer life.
