
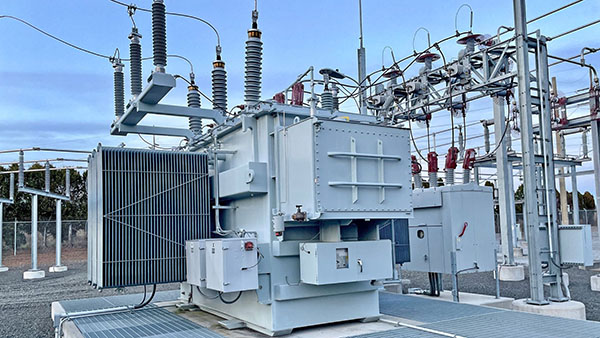
Transformers are a critical part of the electrical grid, and the performance and longevity of these high-voltage devices are greatly influenced by the condition of their bushings. Bushings, which serve as the interface between a transformer’s internal components and external electrical connections, are integral for maintaining safety and performance. However, over time, they can become damaged or wear out due to factors like environmental stress, aging, and operational conditions. Repairing transformer bushings is essential for keeping the transformer in peak operating condition and preventing costly failures.
In this article, we will explore the tools and techniques needed for successful bushing repairs. We’ll also share practical tips, best practices, and troubleshooting advice to help ensure your transformer’s bushings remain reliable for years to come.
Why Bushing Repairs Matter
Bushing failures, whether caused by oil leakage, cracks in the insulating material, or electrical breakdowns, can lead to severe operational consequences. When bushings fail, they can result in:
- Oil Leaks: This can compromise insulation, leading to higher risk of electrical faults.
- Arcing or Short Circuits: Compromised bushings increase the risk of arcing, which can short-circuit the transformer, resulting in costly damage.
- Operational Downtime: Transformer downtime, especially due to bushing failure, can result in significant operational losses and repair costs.
The good news is that with timely repairs, many bushing issues can be resolved before escalating into more significant problems. Understanding the tools and techniques necessary for these repairs is key to achieving long-term transformer reliability.
Common Bushing Problems That Require Repair
Before diving into the repair techniques, let’s identify some of the most common bushing issues that may need attention:
1. Oil Leaks
Oil leaks around the bushing area can indicate a problem with the seal, gasket, or insulating materials inside the bushing.
Common Causes:
- Damaged seals or gaskets
- Cracked insulating material
- Age-related degradation of the bushing housing
2. Cracked or Damaged Bushing Insulation
If the insulation around the bushing becomes cracked, moisture can enter, compromising its dielectric strength and increasing the risk of failure.
Common Causes:
- Physical damage from impacts or weathering
- Excessive voltage stresses causing degradation of insulation
3. Bushing Movement or Instability
Loose or unstable bushings can cause mechanical stress on the transformer, leading to internal damage or even complete transformer failure.
Common Causes:
- Improper mounting or installation
- Wear and tear of mounting components
4. Moisture Ingress
Moisture entering the bushing can cause electrical breakdowns, reducing its insulating properties and leading to failure.
Common Causes:
- Seal failure
- High humidity environments
Tools You’ll Need for Bushing Repairs
Proper tools are critical to ensuring safe and efficient bushing repairs. Below is a list of essential tools you’ll need to tackle bushing repair projects.
1. Insulation Resistance Tester
An insulation resistance tester is used to check the integrity of the bushing insulation before and after repairs. This tool helps ensure that the insulation is still effective and that no electrical breakdowns will occur.
How to Use:
- Test the bushing insulation before starting repairs to establish a baseline resistance value.
- After repairs, use the insulation resistance tester to verify that the bushing’s insulation is restored to its proper condition.
2. Leak Detection Equipment
If you suspect oil leakage or moisture ingress, leak detection equipment, such as a thermal imager or a liquid leak detector, is essential. These tools help identify the location and extent of any leaks so that repairs can be made effectively.
How to Use:
- Use a thermal imager to check for temperature variations around the bushing, as oil leaks can create hot spots.
- Use a liquid leak detector to pinpoint the exact location of oil or moisture leaks.
3. Torque Wrench
A torque wrench is essential for ensuring that the bushing is tightened to the manufacturer’s specified torque, particularly during reinstallation or after performing repairs.
How to Use:
- When reassembling a bushing, tighten the nuts and bolts gradually, checking the torque with a torque wrench to avoid over-tightening or under-tightening.
4. Hydraulic Press
For bushings that are difficult to remove due to corrosion or mechanical damage, a hydraulic press can be used to safely dislodge the bushing without damaging surrounding components.
How to Use:
- Place the transformer’s bushing in the hydraulic press.
- Apply gradual pressure to safely remove the bushing from its mounting location.
5. Sealant and Gaskets
For oil leaks, you’ll need appropriate sealant and gaskets to create a tight seal and restore the bushing to its original condition. It’s important to select materials that are compatible with transformer oil and capable of withstanding high temperatures.
How to Use:
- Remove any old or degraded seals.
- Apply the new sealant and place the gasket around the bushing to ensure a proper seal.
6. Moisture Extraction System
If moisture has entered the bushing, a moisture extraction system is necessary to remove it before re-sealing. This could involve vacuum drying or the use of silica gel or other desiccants to absorb the moisture.
How to Use:
- Place the bushing in a moisture extraction system.
- Monitor the drying process, ensuring all moisture is removed from the insulation before reassembly.
Step-by-Step Guide to Bushing Repairs
Once you have the necessary tools, it’s time to begin the repair process. The following steps outline a general approach to bushing repairs, but keep in mind that manufacturer-specific guidelines should always be followed for optimal results.
1. Power Down and Isolate the Transformer
Before beginning any repair work, ensure that the transformer is completely powered down, and all safety protocols are in place. Isolate the transformer to prevent any electrical hazards.
2. Inspect the Bushing
Conduct a thorough visual inspection of the bushing. Check for cracks, leaks, discoloration, or signs of moisture ingress. Use the insulation resistance tester to measure the insulation value, and check for abnormalities that might indicate the need for repairs.
3. Remove the Bushing
If the bushing needs to be replaced or repaired, carefully remove it from the transformer. Use the hydraulic press, if necessary, to safely extract the bushing without causing damage to other transformer components.
4. Clean and Prepare the Bushing Area
Clean the area around the bushing to remove any debris, dirt, or oil. Ensure that the area is free from contamination before proceeding with repairs.
5. Repair or Replace the Bushing
Depending on the issue, either repair the existing bushing or replace it with a new one. For oil leaks, apply sealant and replace any damaged gaskets. For cracks or moisture ingress, replace the bushing or dry out the existing bushing using a moisture extraction system.
6. Reinstall the Bushing
Once the bushing has been repaired or replaced, carefully reinstall it. Use a torque wrench to tighten the mounting bolts according to the manufacturer’s specified torque value.
7. Test and Monitor the Repair
After reinstalling the bushing, conduct another insulation resistance test to verify that the bushing is performing correctly. Monitor the transformer over time to ensure that no new issues arise.
Troubleshooting Common Bushing Repair Issues
While bushing repairs can often resolve issues, it’s important to troubleshoot effectively if problems persist. Here are some troubleshooting steps to follow:
- Persistent Oil Leaks: If oil continues to leak despite applying sealant, it could indicate that the bushing or gasket is cracked. Ensure that all components are replaced and that the new seals are installed correctly.
- Moisture Ingress After Drying: If moisture continues to be present after drying, there may be cracks in the bushing that are allowing moisture to enter. Inspect the insulation thoroughly and replace the bushing if necessary.
- Inconsistent Insulation Resistance: If the insulation resistance tester shows inconsistent or low readings, the bushing may still have internal damage that wasn’t addressed during the initial repair. In this case, replacing the bushing may be necessary.
Best Practices for Bushing Maintenance and Longevity
While repairs are sometimes necessary, the best approach to bushing longevity is preventative maintenance. Here are some best practices:
- Regular Inspections: Perform routine visual inspections and insulation resistance tests to catch early signs of damage.
- Seal and Gasket Replacement: Over time, seals and gaskets wear out. Replace them periodically to prevent oil leaks.
- Moisture Control: Use moisture control systems to prevent water ingress into the bushing. Implementing proper sealing techniques is key to maintaining bushing integrity.
- Oil Sampling: Regularly sample the transformer oil for contamination or degradation, as poor oil quality can lead to premature bushing failure.
Conclusion
Bushing repairs are an essential part of transformer maintenance and require a careful approach to ensure safety and efficiency. By using the right tools and following a systematic repair process, you can address bushing issues promptly and prevent transformer failures. Regular inspections, timely repairs, and preventative maintenance will go a long way in prolonging the lifespan of your transformer’s bushings and ensuring reliable transformer operation.
Investing in proper bushing maintenance now can save you from expensive repairs and unplanned downtime later, keeping your transformer running smoothly for years to come.
