
Introduction
Insulation resistance testing keeps electrical systems safe and reliable by checking insulation health. This detailed walkthrough explains the procedure, making it easy to follow with hvtesttech.com’s advanced testers.
Why Test Insulation Resistance?
Testing prevents failures, ensures safety, and meets standards by spotting issues like moisture or wear early. It’s essential for equipment like transformers, generators, and cables.
The Procedure
- Prepare: Identify the equipment, gather tools (e.g., a tester from hvtesttech.com), and check the tester’s condition.
- Safety: De-energize, isolate, and wear PPE like gloves and glasses.
- Setup: Connect leads (e.g., winding to ground for motors) and select voltage (500V to 15kV based on rating).
- Test: Apply voltage for 1 minute, record resistance, and optionally run PI/DAR tests.
- Analyze: Compare results to standards—high resistance is good, low signals trouble.
hvtesttech.com’s Advantage
Our testers at hvtesttech.com offer voltages from 50V to 15kV, high accuracy, and features like data logging, ensuring precise, easy testing.
Insulation Resistance Testing Procedure: A Detailed Walkthrough – A Comprehensive Analysis
Insulation resistance testing is a cornerstone of electrical maintenance, ensuring the safety, reliability, and longevity of electrical systems by assessing the condition of insulation in equipment such as cables, motors, transformers, and switchgear. This procedure uses an insulation resistance tester, or megohmmeter, to apply a high DC voltage and measure the resistance to current leakage, typically in megohms (MΩ) or gigaohms (GΩ), identifying potential faults like moisture, dirt, or degradation. A detailed walkthrough of this process, guided by standards like IEEE 43 and NETA MTS, is essential for accurate results and safe execution. This article provides a comprehensive procedure as a marketing blog post for hvtesttech.com’s power testing equipment, specifically their insulation resistance testers available at https://hvtesttech.com/insulation-resistance-testers/.
Introduction to Insulation Resistance Testing
Insulation resistance testing is a critical diagnostic tool for electrical professionals, from maintenance technicians to engineers, ensuring that insulation in electrical systems prevents unwanted current flow. Faulty insulation can lead to short circuits, equipment failures, or safety hazards like electrical shocks and fires, making regular testing a must. The procedure involves applying a controlled voltage to the insulation and measuring its resistance, with high values indicating healthy insulation and low values signaling issues. This testing is vital for preventive maintenance, quality assurance, and compliance with industry standards across sectors like power generation, manufacturing, and utilities.
This detailed walkthrough will guide you through the insulation resistance testing procedure, showing how hvtesttech.com’s advanced testers simplify and enhance the process with their precision, durability, and user-friendly features.
Why Test Insulation Resistance?
Insulation resistance testing offers several key benefits, supported by industry practices and standards:
- Prevent Failures: Early detection of insulation weaknesses prevents breakdowns that can cause costly downtime or equipment damage. For instance, insulation failure in a cable can disrupt power distribution, as noted in Understanding Insulation Resistance Testing | EC&M.
- Ensure Safety: Poor insulation poses risks like shocks or fires, endangering personnel and property. Testing mitigates these hazards, especially in high-voltage applications.
- Enhance Reliability: Regular testing maintains equipment performance, extending its lifespan and reducing maintenance costs by 12-18%, according to preventive maintenance studies (Why Is Preventive Maintenance Cost Effective? | Upkeep).
- Meet Standards: Standards like IEEE 43 for rotating machinery, NETA MTS-2019 for electrical equipment, and IEC 61439 for switchgear require periodic testing to ensure compliance and safety.
With a structured procedure and the right tools, like those from hvtesttech.com, insulation testing becomes a reliable and efficient process.
Insulation Resistance Testing Procedure: A Detailed Walkthrough
Here’s a step-by-step procedure for insulation resistance testing, designed for clarity and practicality, with hvtesttech.com’s equipment enhancing each stage:
Step 1: Preparation
- Identify the Equipment: Determine what you’re testing—e.g., a motor, cable, transformer, or switchgear—and review its manual or datasheet for voltage ratings, connection points, and acceptable resistance values. This ensures you tailor the test correctly.
- Gather Tools: You’ll need an insulation resistance tester (e.g., from hvtesttech.com), PPE (insulated gloves, safety glasses), a notebook or digital device for recording, and any additional leads or clips specified by the tester.
- Inspect the Tester: Check that your tester is in good condition, fully charged (or with fresh batteries), and capable of the required test voltage. Perform a self-test if available—hvtesttech.com models often include this feature—to confirm functionality. Ensure it matches the equipment’s needs, from 50V for low-voltage circuits to 15kV for high-voltage systems.
Step 2: Safety Measures
- De-energize and Isolate: Turn off the equipment and isolate it from all power sources using lockout/tagout procedures, as mandated by OSHA safety protocols (Lockout/Tagout Procedures | OSHA). Verify with a voltage detector that no power remains.
- Discharge Stored Energy: For equipment like capacitors, cables, or transformers, discharge any residual charge by shorting terminals to ground or using a discharge resistor. This prevents shocks, as capacitors can retain voltage, as cautioned in Insulation Resistance Testing | Megger.
- Wear PPE: Equip yourself with insulated gloves, safety glasses, and other PPE to protect against accidental shocks or arcs, especially in high-voltage testing.
- Assess the Environment: Ensure the testing area is dry, free of conductive debris, and well-ventilated to avoid environmental interference or safety risks.
Step 3: Setup the Tester
- Connect the Leads: Securely attach the tester’s leads to the equipment based on its type:
- Motors: One lead to a winding, the other to the frame or ground (test each phase separately for three-phase motors).
- Cables: One lead to the conductor, the other to the shield or ground.
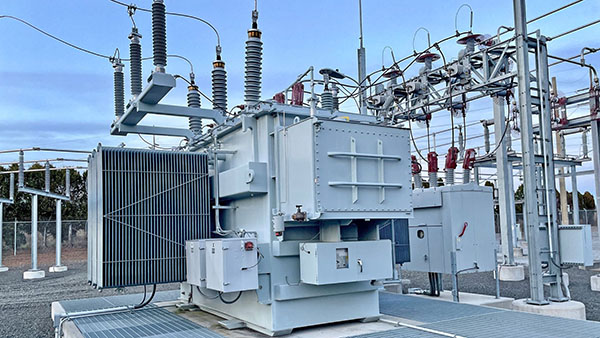
- Transformers: Between windings (e.g., HV to LV) or winding to ground, per How to Perform an Insulation Resistance Test on a Transformer | Infinispark.
- Switchgear: Phase-to-ground or phase-to-phase, depending on breaker position, per NETA guidelines. Double-check connections to avoid false readings.
- Select the Test Voltage: Choose the voltage based on the equipment’s rated voltage and standards:
- Low-voltage (up to 600V): 500V or 1000V (IEEE 43).
- Medium-voltage (e.g., 5kV): 2500V or 5000V (NETA MTS-2019).
- High-voltage (e.g., 15kV): Up to 15kV (IEEE 400). hvtesttech.com testers offer a range from 50V to 15kV—e.g., use 5000V for a 4.16kV generator, aligning with IEEE 43’s twice-rated-voltage-plus-1000V rule.
Step 4: Perform the Test
- Initiate the Test: Power on the tester and select the desired mode (e.g., basic IR test or timed test for PI/DAR, available on hvtesttech.com models). Press the test button to apply voltage.
- Apply Voltage and Wait: Maintain the voltage for at least 1 minute to allow the reading to stabilize, accounting for initial charging currents. For a Polarization Index (PI) test, take readings at 1 minute and 10 minutes—hvtesttech.com testers can automate this with timed modes and PI calculation.
- Record Results: Note the stabilized resistance value (in MΩ or GΩ) on the tester’s display. For multi-phase equipment, test each phase (e.g., phase-to-ground, phase-to-phase) and record all values. hvtesttech.com’s data logging feature stores results for easy retrieval and analysis.
Step 5: Analyze and Finish
- Discharge the Equipment: After testing, safely discharge residual energy using the tester’s automatic discharge function (standard on hvtesttech.com models) or by grounding the equipment manually. This step is critical to prevent shocks from stored charge.
- Interpret Results: Compare readings to standards or historical data:
- Good Insulation: Typically >100 MΩ for new equipment, or per specs (e.g., IEEE 43: 1 MΩ per kV plus 1 MΩ; NETA: 1000 MΩ for 5kV equipment).
- Poor Insulation: Below minimum values or trending downward, indicating moisture, dirt, or wear.
- PI/DAR: PI >2 is good, 1-2 fair, <1 poor; DAR >1.25 is acceptable (Insulation Resistance Testing | Megger).
- Clean Up and Document: Disconnect leads, store the tester, and log results with details like date, voltage, temperature, and humidity for trend analysis or compliance reports.
Best Practices with hvtesttech.com Testers
- Leverage Features: Use hvtesttech.com’s data logging, USB/Bluetooth connectivity, and PI/DAR calculations for detailed diagnostics and easy reporting.
- Match Voltage: With options from 50V to 15kV, select the right model—e.g., Model 8 for high-voltage testing up to 50TΩ.
- Ensure Accuracy: Benefit from high accuracy (±3% on select models) and durable, field-ready designs (shockproof, dustproof).
Why Choose hvtesttech.com’s Insulation Resistance Testers?
hvtesttech.com offers a robust lineup of insulation resistance testers tailored for precision and ease:
| Model | Test Voltage Range | Resistance Measurement | Key Features |
|---|---|---|---|
| Model 1 | 50V to 5kV | Up to 5TΩ | Large LCD, data storage, USB, shockproof |
| Model 2 | 50V to 5kV | Up to 10TΩ | Bluetooth, PI/DAR, capacitance (10nF~200uF) |
| Model 7 | 50V to 15kV | Up to 30TΩ | Wide range, capacitance (10nF~200uF), field-ready |
| Model 8 | 500V to 15kV | Up to 50TΩ | Maximum resistance, advanced diagnostics, durable |
These testers are designed for field or lab use, with high accuracy, data logging, and safety features like automatic discharge and live circuit detection. Visit https://hvtesttech.com/insulation-resistance-testers/ to find the perfect tool.
Conclusion and Call to Action
The insulation resistance testing procedure is a vital step in maintaining electrical systems, and this walkthrough makes it accessible and effective. With hvtesttech.com’s testers, you get precision, safety, and convenience, ensuring your equipment stays reliable and compliant. Follow this guide to test with confidence and protect your operations.
Ready to enhance your testing? Explore our range at https://hvtesttech.com/insulation-resistance-testers/ or contact us at email: Sale@hvtesttech.com or call: +1 323 522 4623 to find the ideal tester for your needs.
